I saw a couple things that you could buy on pinterest that were really cute, but I decided I did not want to buy them, I wanted to try and make them. So here they are:
One for me and one for Trevor - hopefully he likes it!
I made them each a different way, but I'm going to share the easier that I found!
First you need a few items:
*Two different fabrics of your choice
*A Liner of some sort - I ended up buy Polished Clear Vinyl. It wasn't even in the fabric section, but I thought it would get the job done! - I just wanted something that would be easy to clean.
*Velco
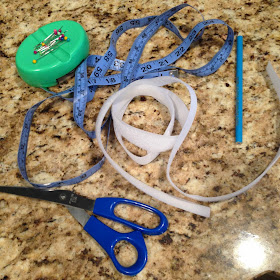
*A few essentials: scissors, measuring item, pins...
Cut the main fabric to be 10 X 13.
Cut the vinyl to be slightly smaller than that - I cut mine to be 9 X 12.
Then you are going to place the 10 X 13 fabric upside down and center the vinyl on it. Then fold the excess fabric over the vinyl. I ironed it down so it had a nice crease. Don't iron the vinyl though, it does funny things! So make the fold, move the vinyl and then iron down. Put the vinyl back in place and do the same thing for the next edge and so forth.
Pin all sides.
Then sew just the short sides - your basically making a top stitch along the short sides - do not do anything with the long sides.
Next, get out your second fabric. You want to measure the short side of your first fabric (the edge that you just sewed) and you want to make your second fabric slight shorter than that. My first fabric was 8 1/2 inches, so I cut my second fabric to be 7 1/2 (1 inch smaller than the first) X 4. So my second fabric was 7 1/2 X 4
Then fold in all edges and top stitch around it.
My angle must be funny because this looks like a square, but it shouldn't be.
Now we need to pin this second piece of fabric to the first.
If you fold your first piece of fabric in half - like its going to be when it's holding a sandwich, you want to pin this to the back side. Depending on your fabric, you might not have a "backside" but I did.
Next, cut a piece of Velcro to measure about 2 1/2 inches. Then, turn your sandwich bag over and pin where you want the Velcro. I just centered mine.
First you will want to sew the second piece of fabric on the first. I sewed right along the top stitch that was already on my second piece of fabric. (Make sure you unfold your sandwich bag when sewing this together).
Flip it over and sew on the Velcro - again, make sure you sandwich bag is not folded in half.
Sew along the 3 edges (right, bottom and left). Sew pretty close to the edge, so you don't waste any space.
Then turn it "right side out".
Now you can sew on the top piece of Velcro. Make sure you make these stitches look neat because these will be seen on the other side.
HERE IT IS!!
I just LOVE how it turned out!
I think these can be used for a lot more stuff other than sandwiches - like different snacks and things. With the vinyl on the inside, it will wash up really nice!


No comments:
Post a Comment